개발 가이드
개발환경
- 로봇 운영체제: Ubuntu 20.04 LTS
- ROS 버전: ROS2 Foxy
Electrical interface

IP
Go2의 메인보드 IP는 '192.168.123.161'이며, Jetson PC(Expansion Dock) IP는 '192.168.123.18' 입니다. 사용자는 메인보드에 접속할 수 없으며, 개발용 PC에만 접속 가능합니다.
- ID: unitree
- PW: 123
User PC와 통신
User PC(Ubuntu Sys)의 이더넷 포트를 사용하여 Go2 Expansion Dock의 이더넷 포트에 연결하면 사용자 PC와 Go2 사이의 통신을 구축할 수 있습니다.
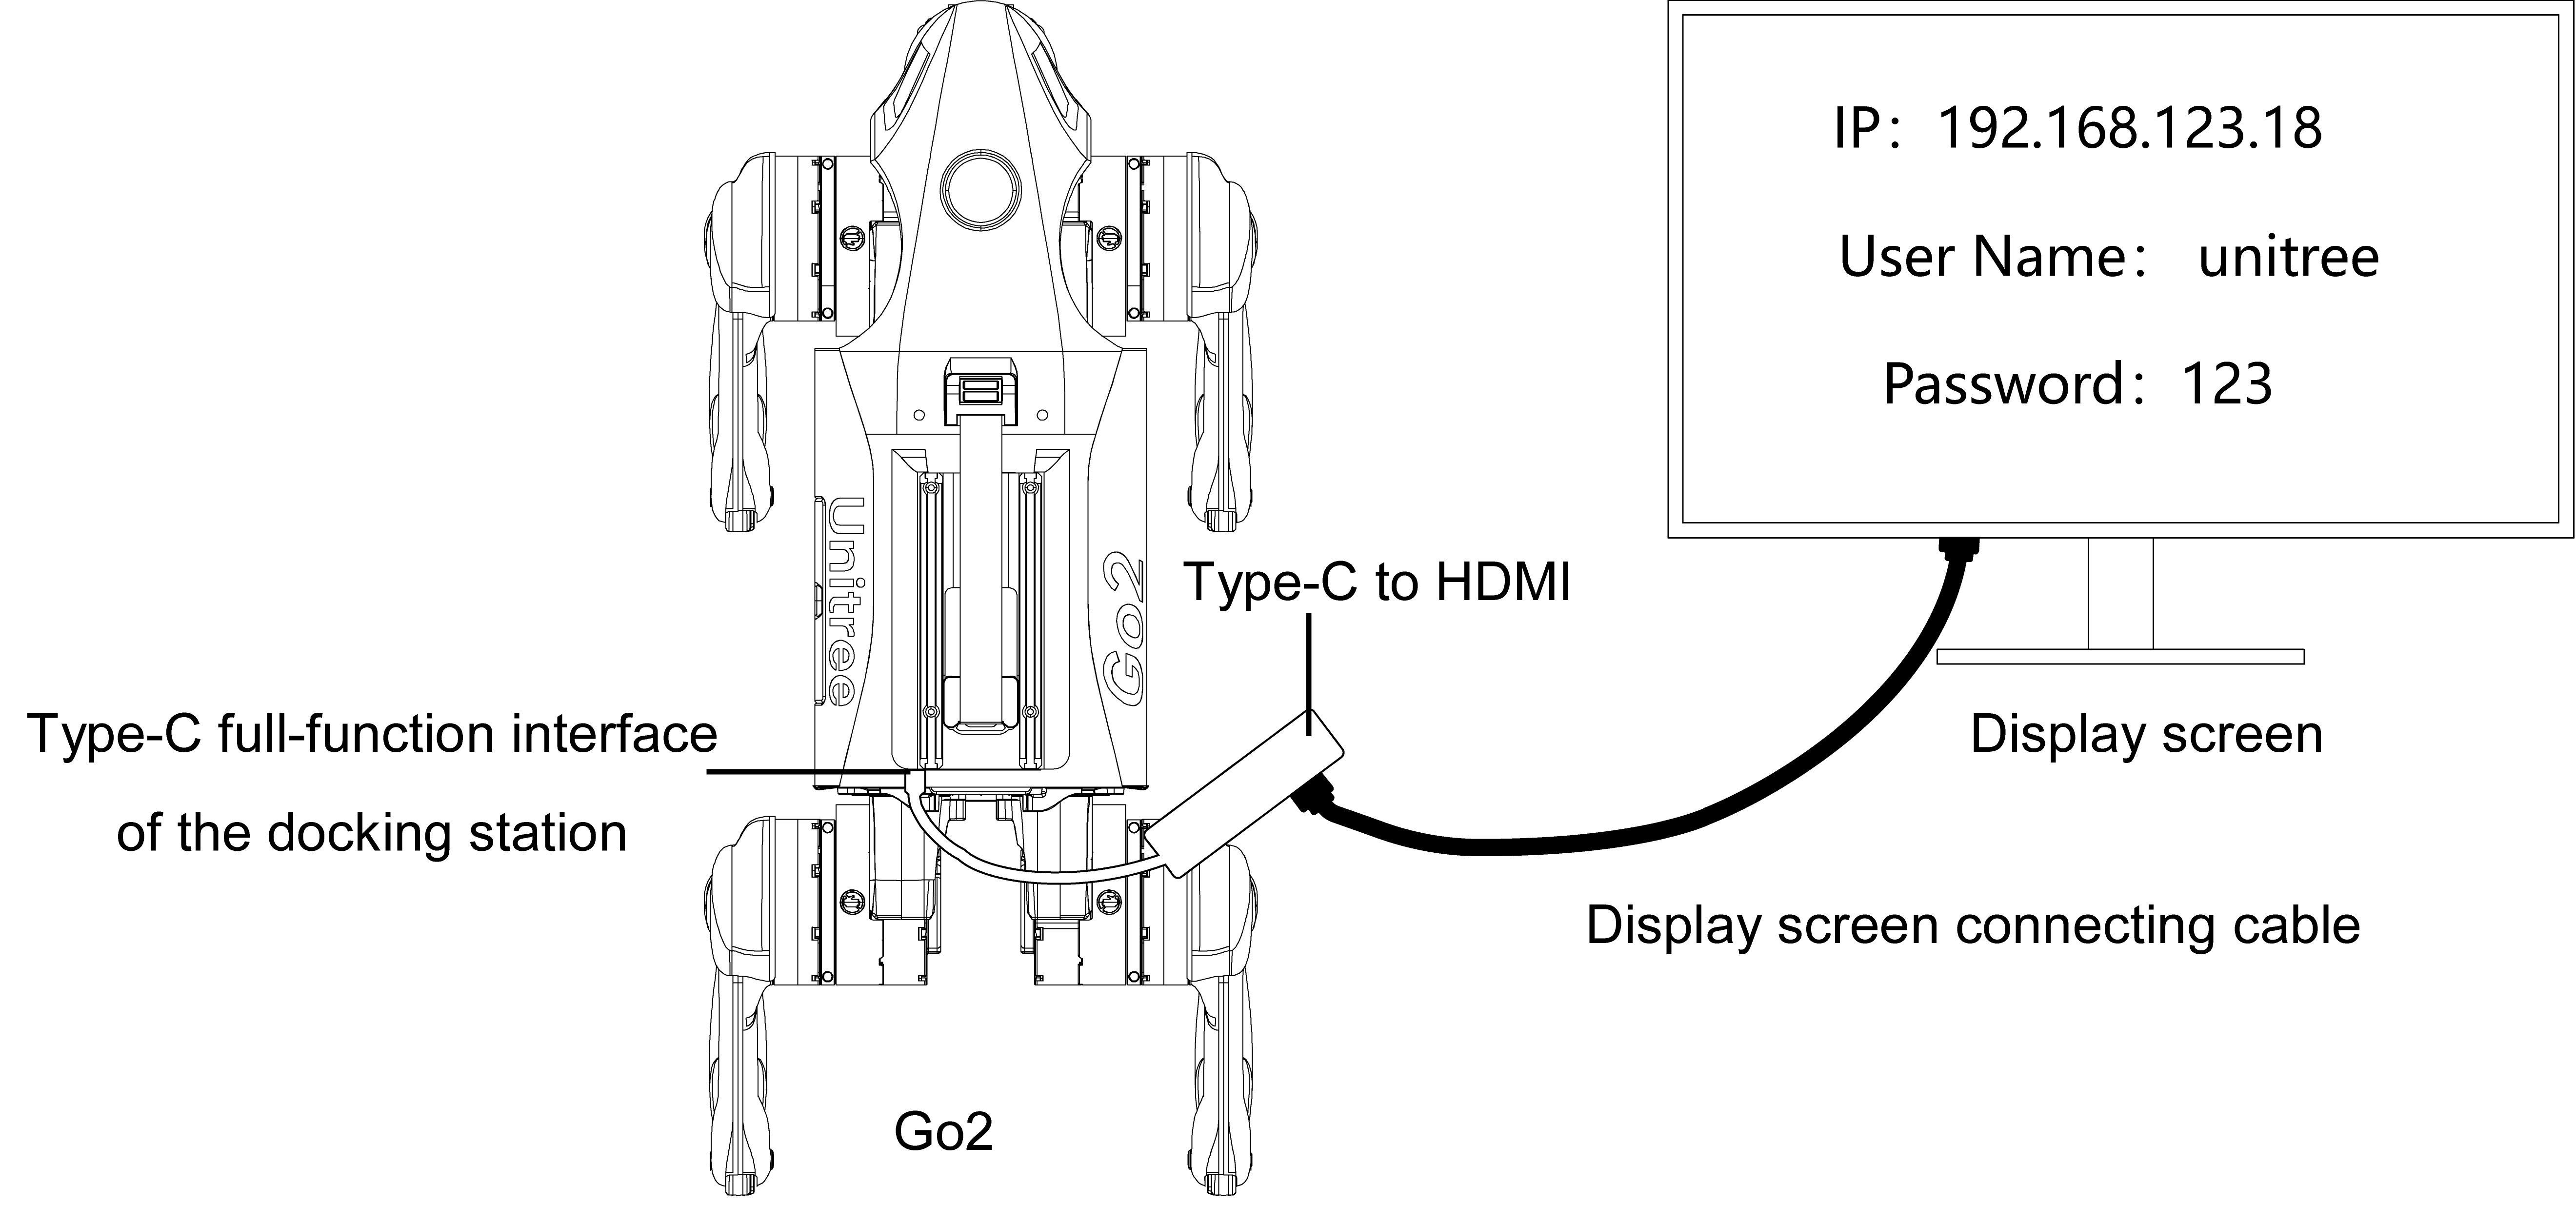
디스플레이 화면 연결
Type-C to HDMI 어댑터를 Expansion dock의 Type-C 인터페이스에 삽입하고, 디스플레이 화면 연결 케이블을 사용하여 외부 디스플레이에 연결합니다.
L1 라이다
: Go2 head에 기본적으로 탑재된 라이다 모델입니다.
- topic name: 'rt/utlidar/cloud'
- coordinate sys: 'utlidar_lidar'
-
DDS를 사용하여 point cloud 데이터 얻기
- unitree_sdk2를 설치합니다.
- 'rt/utlidar/cloud' 토픽 subscribe하면 관련 정보를 출력하실 수 있습니다.
$ ./subscribe_pointcloud
Received a raw cloud here!
    stamp = 1683713030.572689533
    frame = utlidar_lidar
    points number = 1402
-
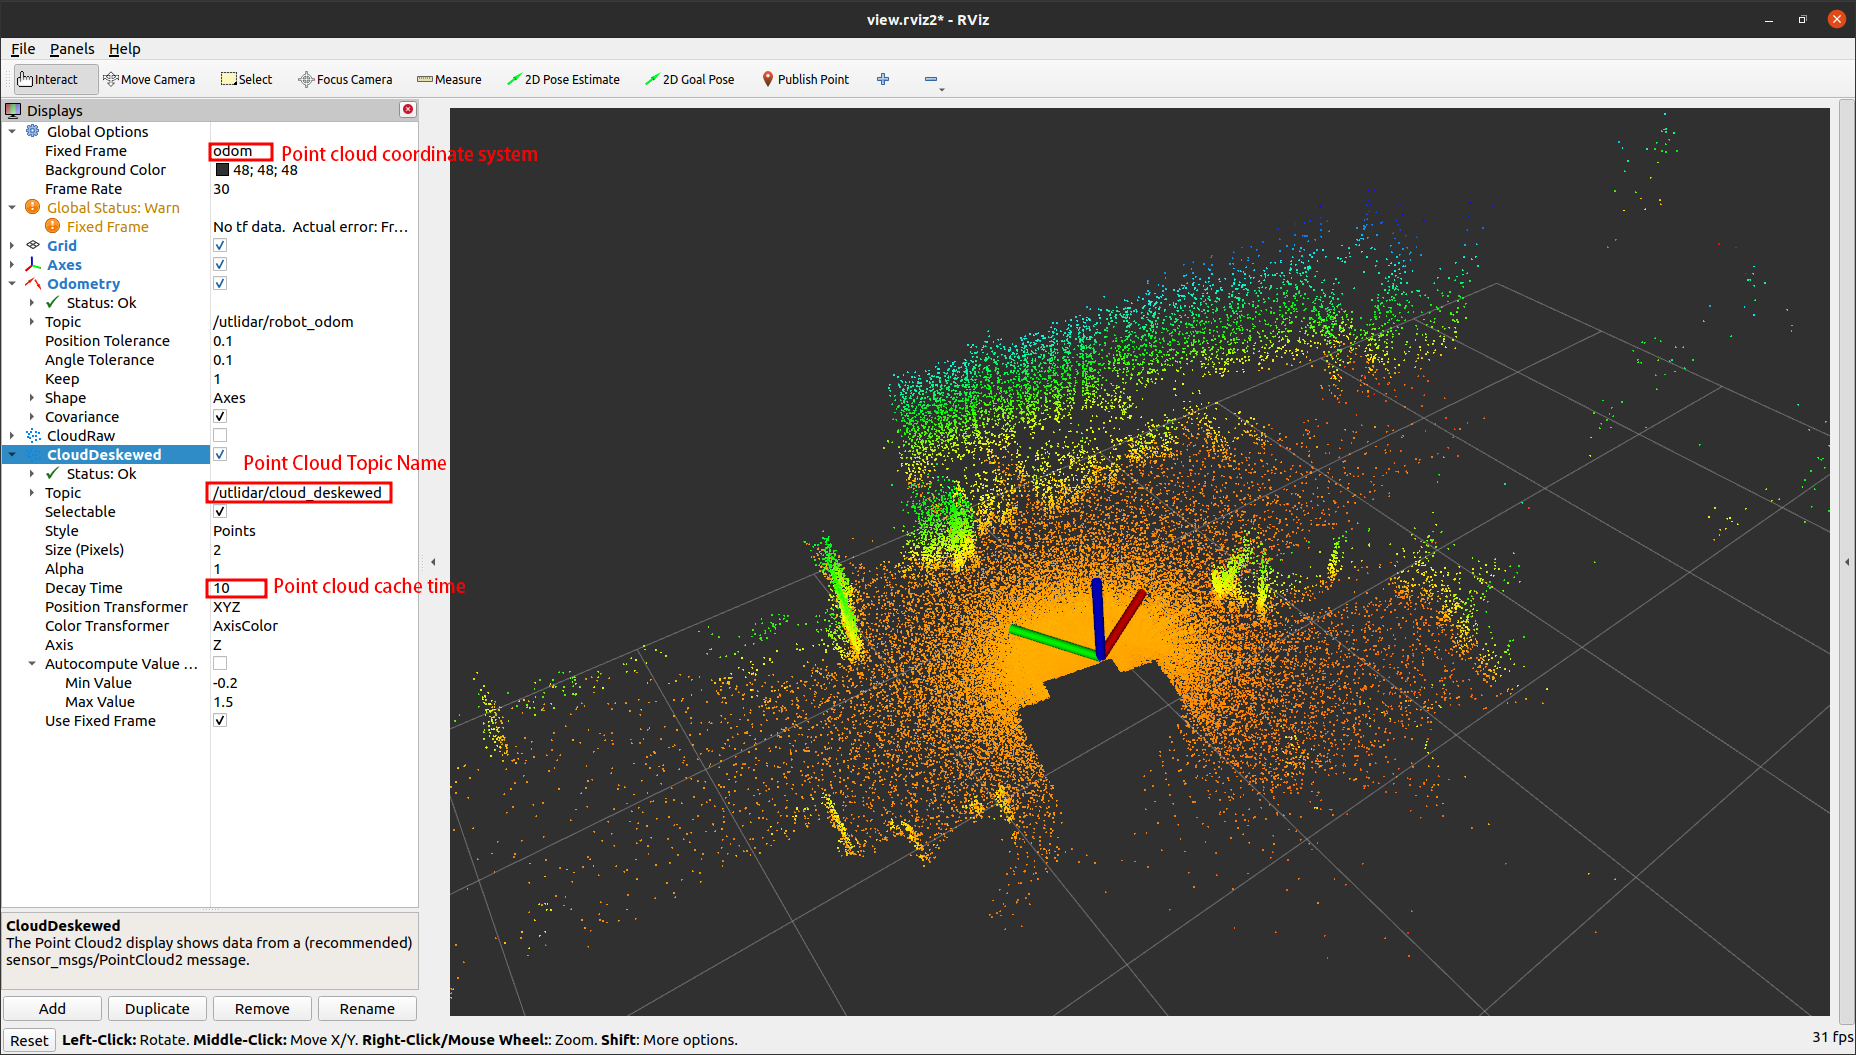
rviz2 도구 실행하여 point cloud 시각화
- 먼저,
$ rviz2를 실행하세요. - [Fixed Frame]을 'odom'으로 설정합니다.
- 왼쪽 하단의 'Add'를 클릭하고 'By topic'을 선택한 후 해당 point cloud 토픽인 '/utlidar/cloud_deskewed'를 선택합니다.
- [Decay Time]을 1초 이상으로 설정하여 특정 시간동안 데이터를 저장할 수 있습니다.
- 먼저,
-
L1 LiDAR 끄는 방법
: L1 LiDAR는 기본적으로 로봇 전원을 켜면 자동으로 시작되도록 설정되어 있습니다. LiDAR를 끄고 싶은 경우(회전 중지), 제어 명령을 publish하여 중지할 수 있습니다.
- DDS topic: 'rt/utlidar/switch'
- 문자열로 'ON / OFF' 내용 전송
Navigation용 외장형 라이다
1️⃣unitree_slam SDK 가이드
- 이더넷 케이블의 한쪽 끝을 Go2에 연결하고, 다른 쪽 끝을 User PC에 연결합니다.
-
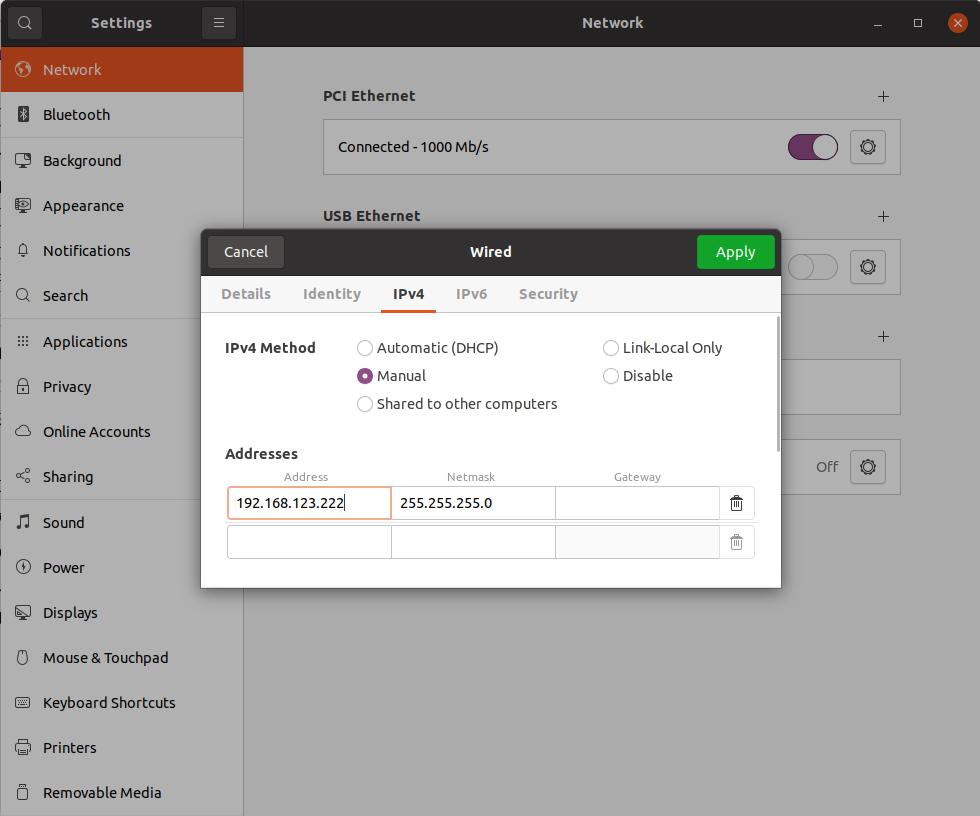
사용자 PC 네트워크 구성을 다음과 같이 수정합니다. 수정 후에는 이더넷 연결을 재활성화 합니다.
-
ping 테스트
$ ping 192.168.123.18 # Docking PC $ ping 192.168.123.20 # LiDAR -
도킹pc 접속
$ ssh -X unitree@192.168.123.18- ID: unitree - PW: 123 -
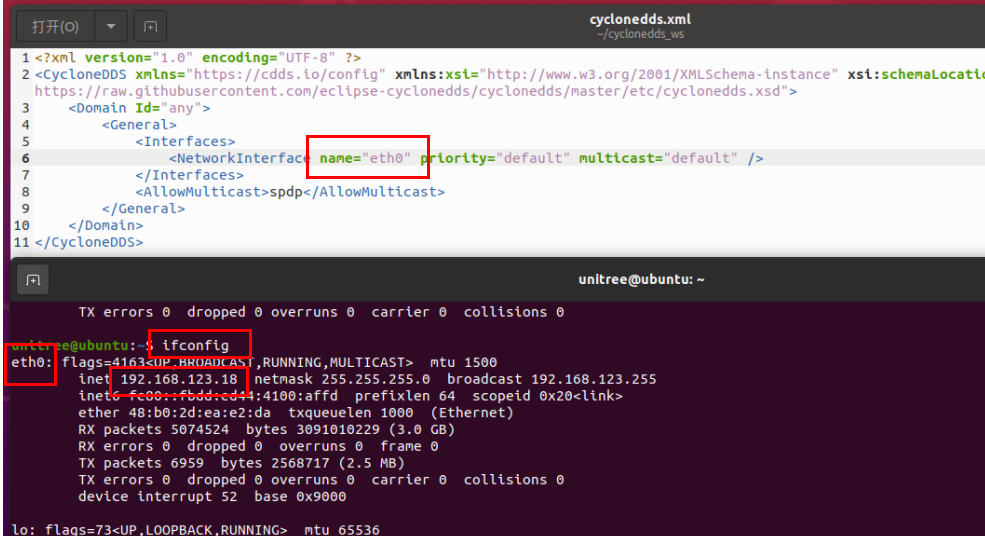
DDS 구성파일 수정
$ ifconfig로 네트워크 카드명 확인- 'cyclonedds.xml' 파일 수정
$ cd /home/unitree/cyclonedds_ws/
$ gedit cyclonedds.xml
-
도킹pc에 SDK2 파일 설치
-
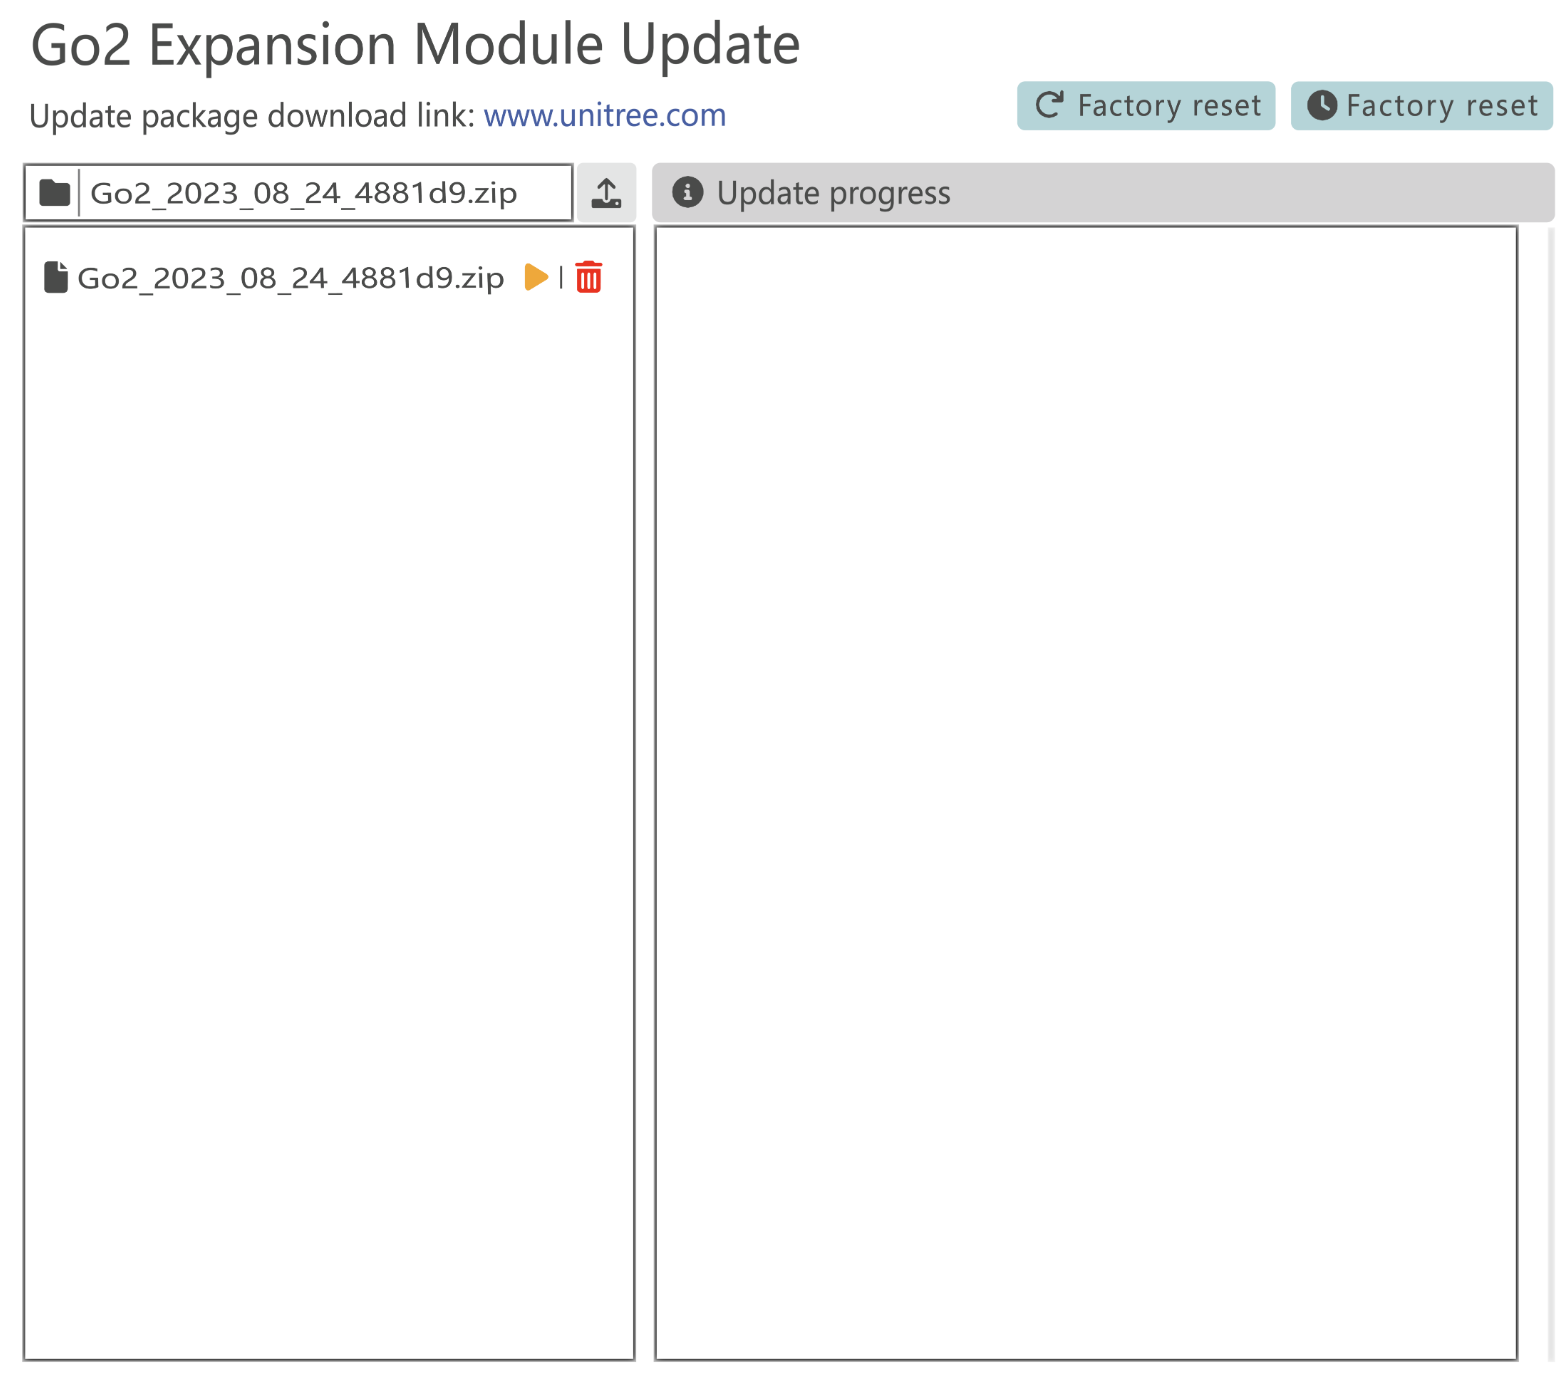
unitree_slam 모듈 업데이트
참고: https://support.unitree.com/home/en/developer/module_update
- 브라우저 주소창에 http://192.168.123.18 입력 후 접속합니다.
-
업데이트 패키지 다운로드
: 위 참고 링크에서 'Expansion Dock Module Update Package' 섹션을 찾아 .zip 파일을 다운로드합니다.
-
업데이트 실행
-
도킹pc 전원모드 설정
: '0:MAXN'
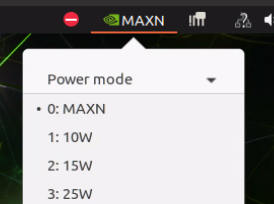
-
실행파일 권한
$ sudo chmod 777 -R /unitree/module/unitree_slam -
lidar_type 수정
: 'param.yaml' 파일에서 lidar_type 항목을 실제 사용 중인 LiDAR 모델(mid360 / xt16)과 로봇 모델(Go2 / Go2_W)에 맞게 수정합니다.
$ cd /unitree/module/unitree_slam/config/slam_interfaces_server_config/ $ gedit param.yaml -
LiDAR 외부 매개변수 수정

unitree_slam SDK 실행 방법
- 터미널1: 먼저,
$ rviz2를 실행하세요. 'File - open configuration'에서/unitree/module/unitree_slam/rviz2/경로에 있는build_map.rviz를 엽니다. -
터미널2: unitree_slam 서비스 실행
$ cd /unitree/module/unitree_slam/bin $ ./unitree_slam -
터미널3: LiDAR 실행
$ cd /unitree/module/unitree_slam/bin $ ./mid360_driver # 또는 ./xt16_driver -
터미널4: Key Demo 실행
$ cd /unitree/module/unitree_slam/bin
$ ./keyDemo eth0
실행 후 w키를 눌러 시작합니다.

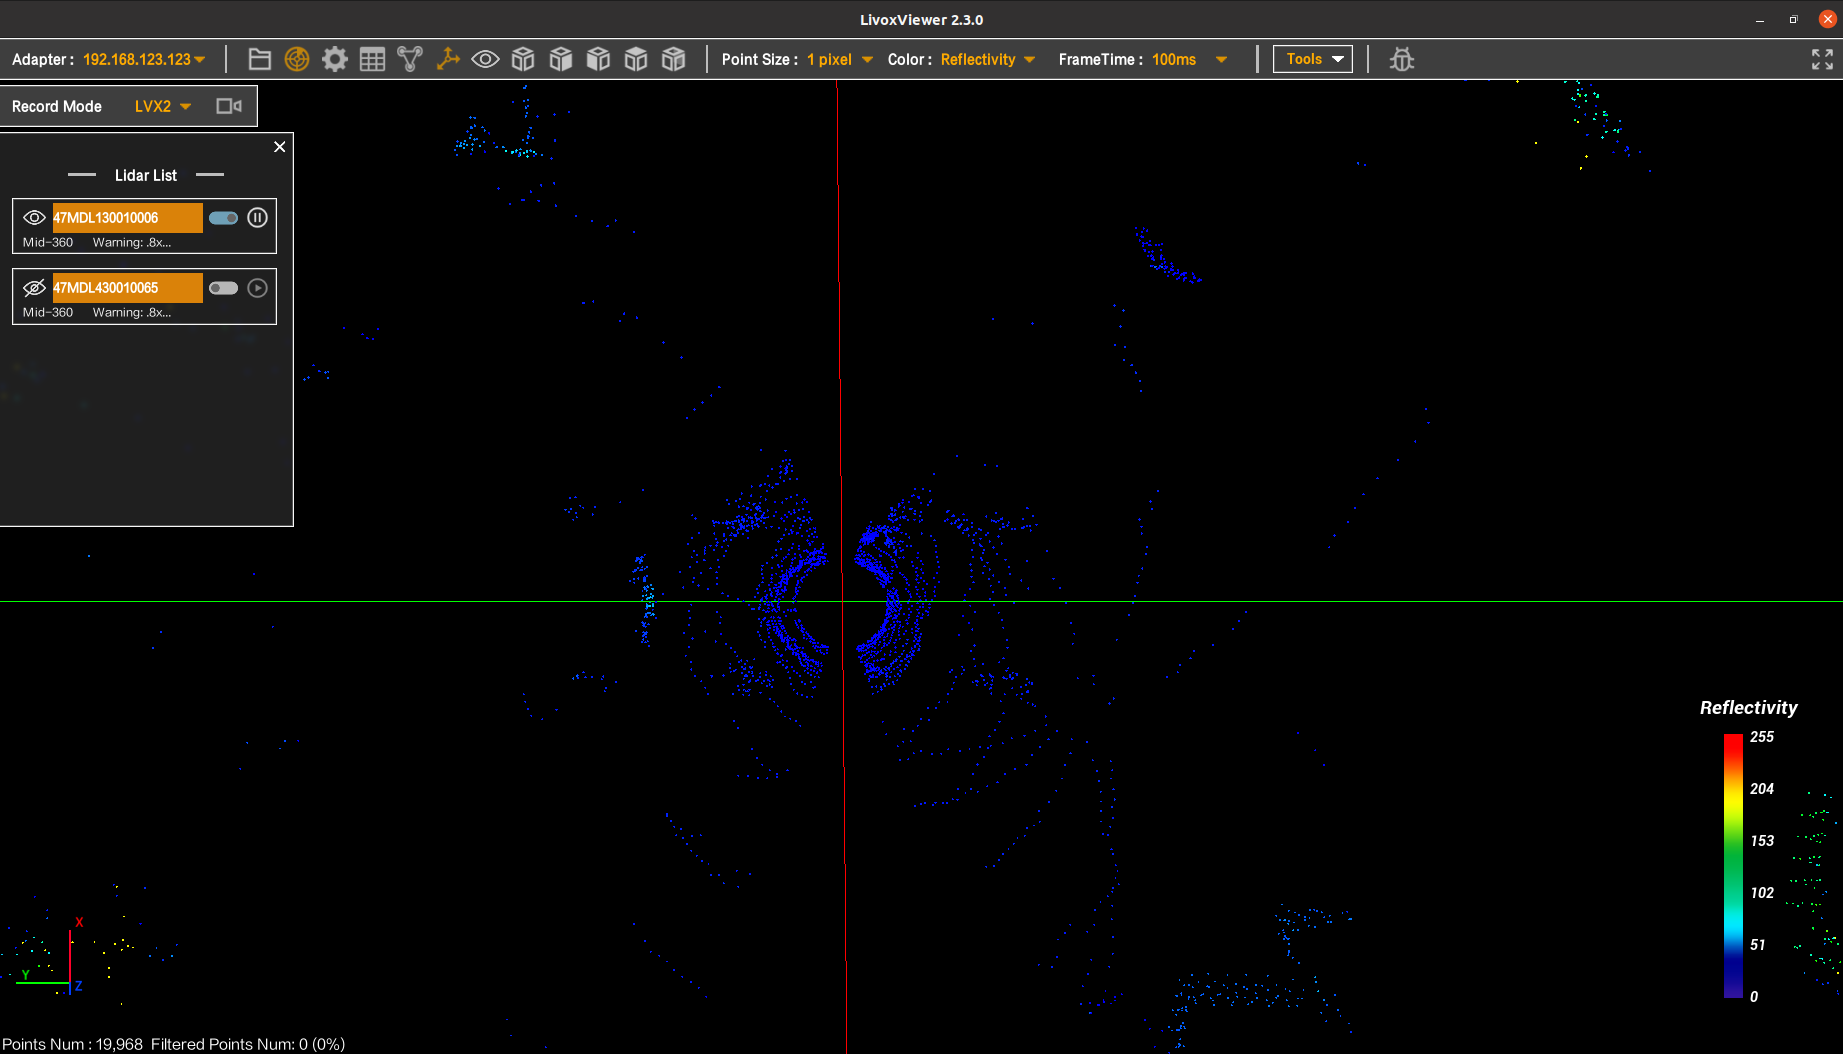
2️⃣MID-360
-
IP: 192.168.123.20
-
Viewer: 🔗Livox Viewer2_Window Version
-
Livox 공식 SDK 가이드
: 🔗Manual - Unitree Support - 참고하여 MID360_config.json 수정
⚠️ G1 목차에 있지만, LiDAR ip 제외 내용 동일합니다.
-
$ git clone https://github.com/Livox-SDK/Livox-SDK2.git
$ cd ./Livox-SDK2/
$ mkdir build
$ cd build
$ cmake .. && make -j
$ sudo make install
-
-
Livox 공식 SDK 실행 방법
$ cd ~/livox_ws/ # cd ~/[work_space_name]/ $ source install/setup.bash $ ros2 launch livox_ros_driver2 [launch file] # ros2 launch livox_ros_driver2 rviz_MID360_launch.py- Fixed Frame: livox_frame
- Topic: /livox/lidar
3️⃣XT-16
-
IP: 192.168.123.20
-
Viewer: 🔗Pandar View2_Window Version
⚠️ 아직 내용 업데이트 중입니다.